Setting up a QuickStack Cluster
QuickStack allows you to scale your applications and improve availability by setting up a cluster across multiple Virtual Private Servers (VPS). This guide walks you through the process of connecting additional servers to your primary QuickStack installation.
Understanding the Concept of a Cluster
- What is a Cluster? A cluster is a group of computers (in this case, VPSs) that work together as a single system. By distributing your applications across multiple servers, you can handle more users, and you provide a more stable environment if one server has a problem.
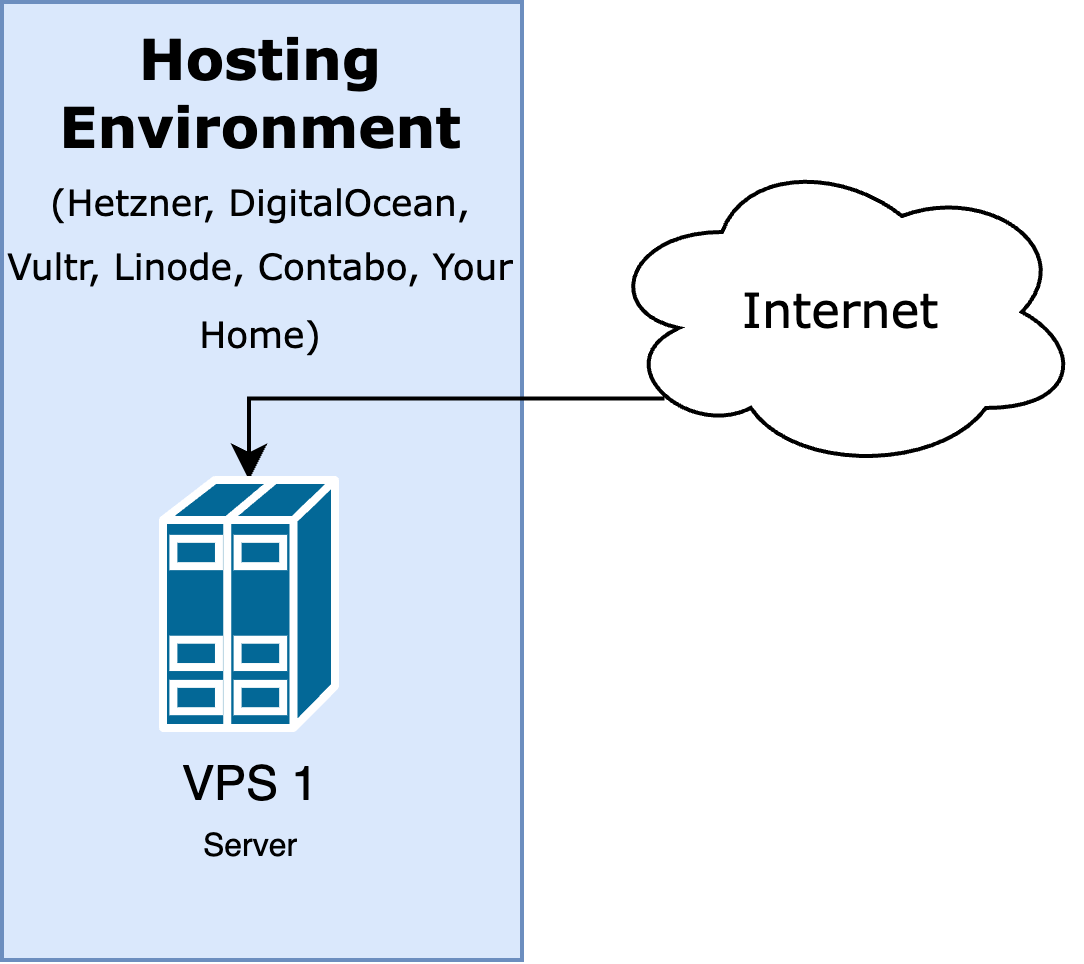
- Single Node Cluster: A single node cluster is a QuickStack installation on a single server. This is the default setup when you install QuickStack for the first time.
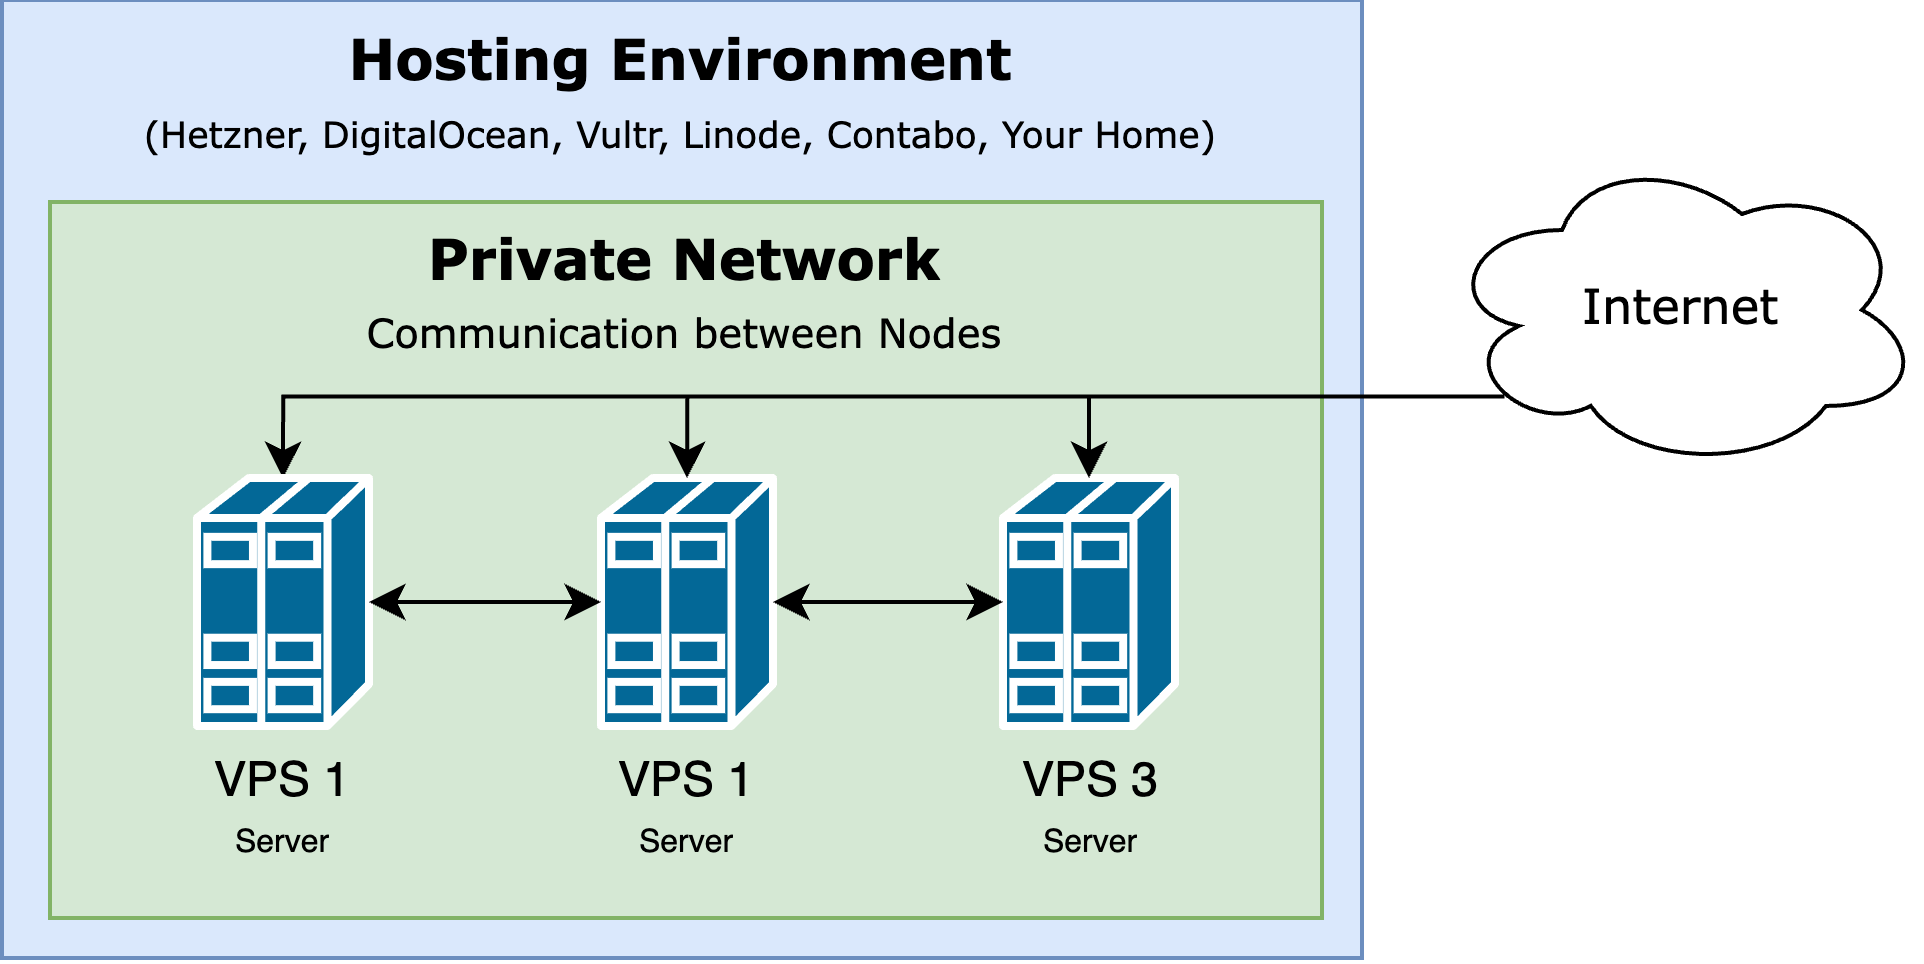
- Multi Node Cluster: A multi-node cluster is a QuickStack installation that spans multiple servers. Each server in the cluster is responsible for running a part of the applications you deploy. It is recommended to use a private network for the communication between the servers.
Single Node Cluster | Multi Node Cluster |
 |  |
Prerequisites
- An Existing QuickStack Installation: You must have already installed QuickStack on at least one server, as described in the Installation guide. This is the primary or master node.
- Additional VPS: You must have additional VPS ready which you want to add to the cluster.
- SSH Access to Each VPS: You need to be able to connect to each VPS using SSH.
- Network Connectivity: All your servers must be able to communicate with each other on the same network. We recommend using a private network for the communication between the servers.
Steps to Set up a Cluster
1. Retrieve the Join Command from the QuickStack Web UI
-
Log in to QuickStack: Open your web browser and navigate to the QuickStack web interface on your primary (master) node's IP address:
http://your_master_ip:30000
Replace your_master_ip with the actual IP or domain of your master node.
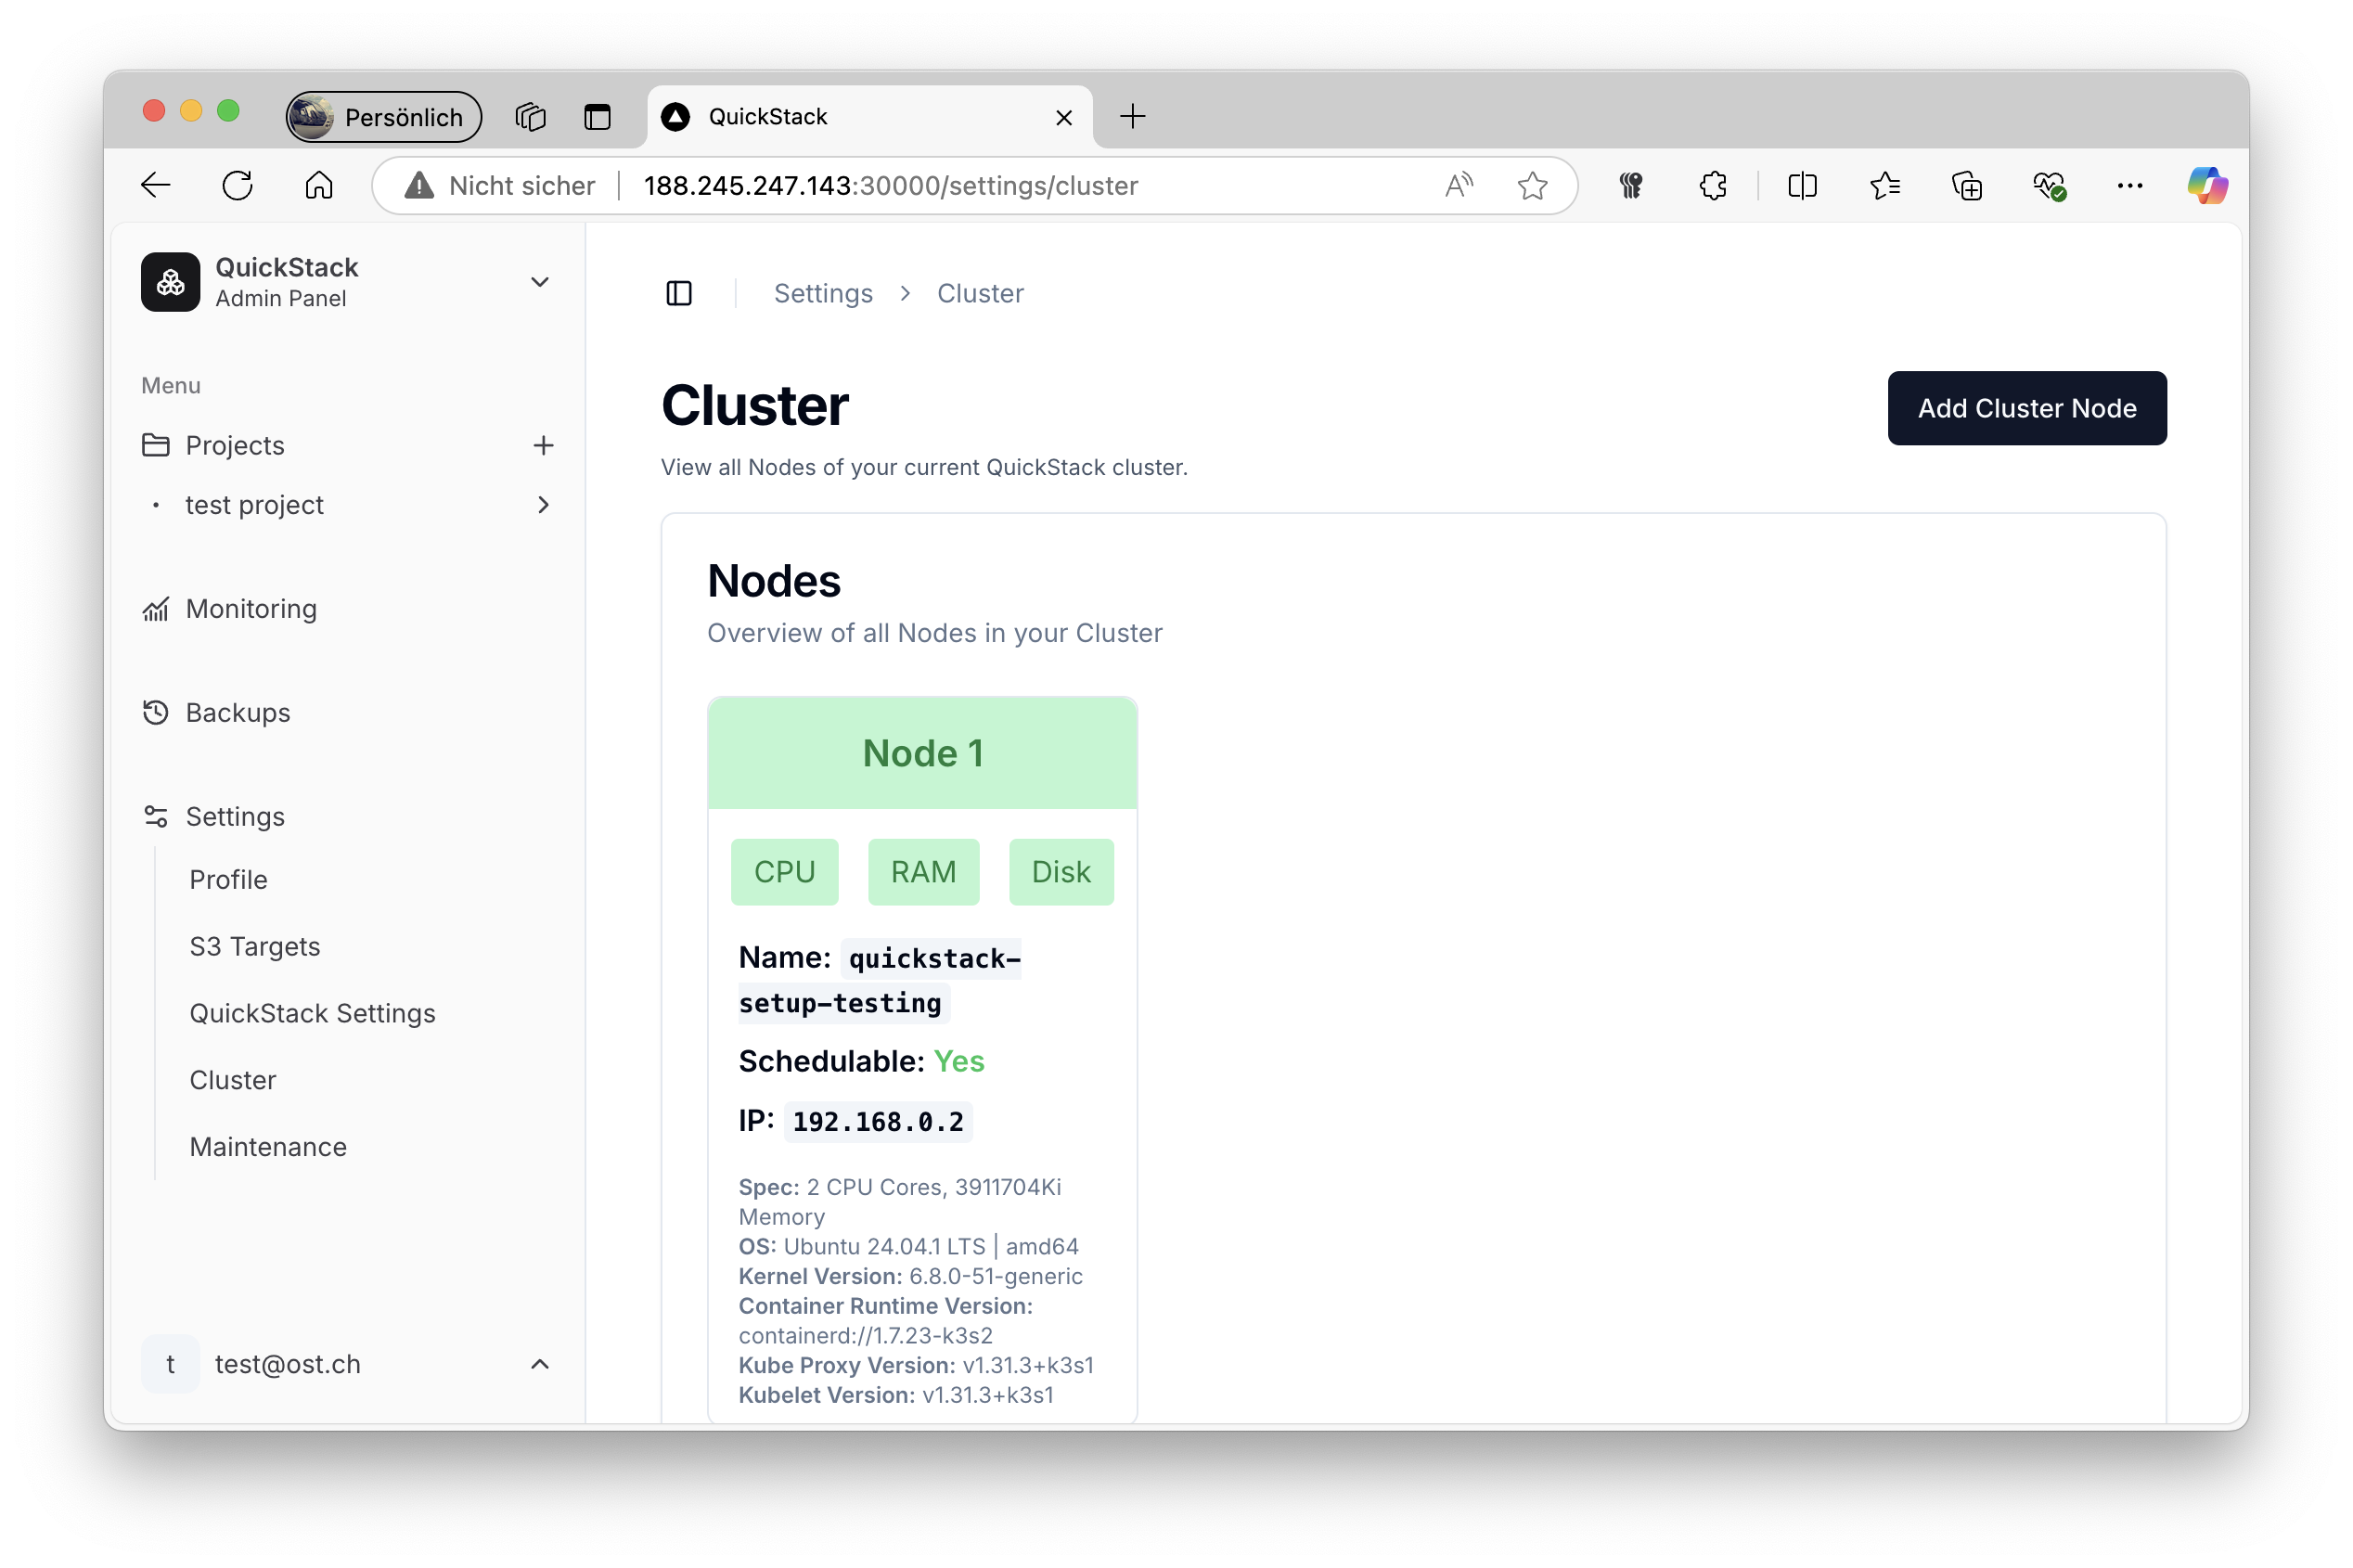
- Navigate to the Cluster Settings: Click on "Settings" and then click on "Cluster". You will see an overview of all your servers wich are part of the cluster.

- Get the Join Command:
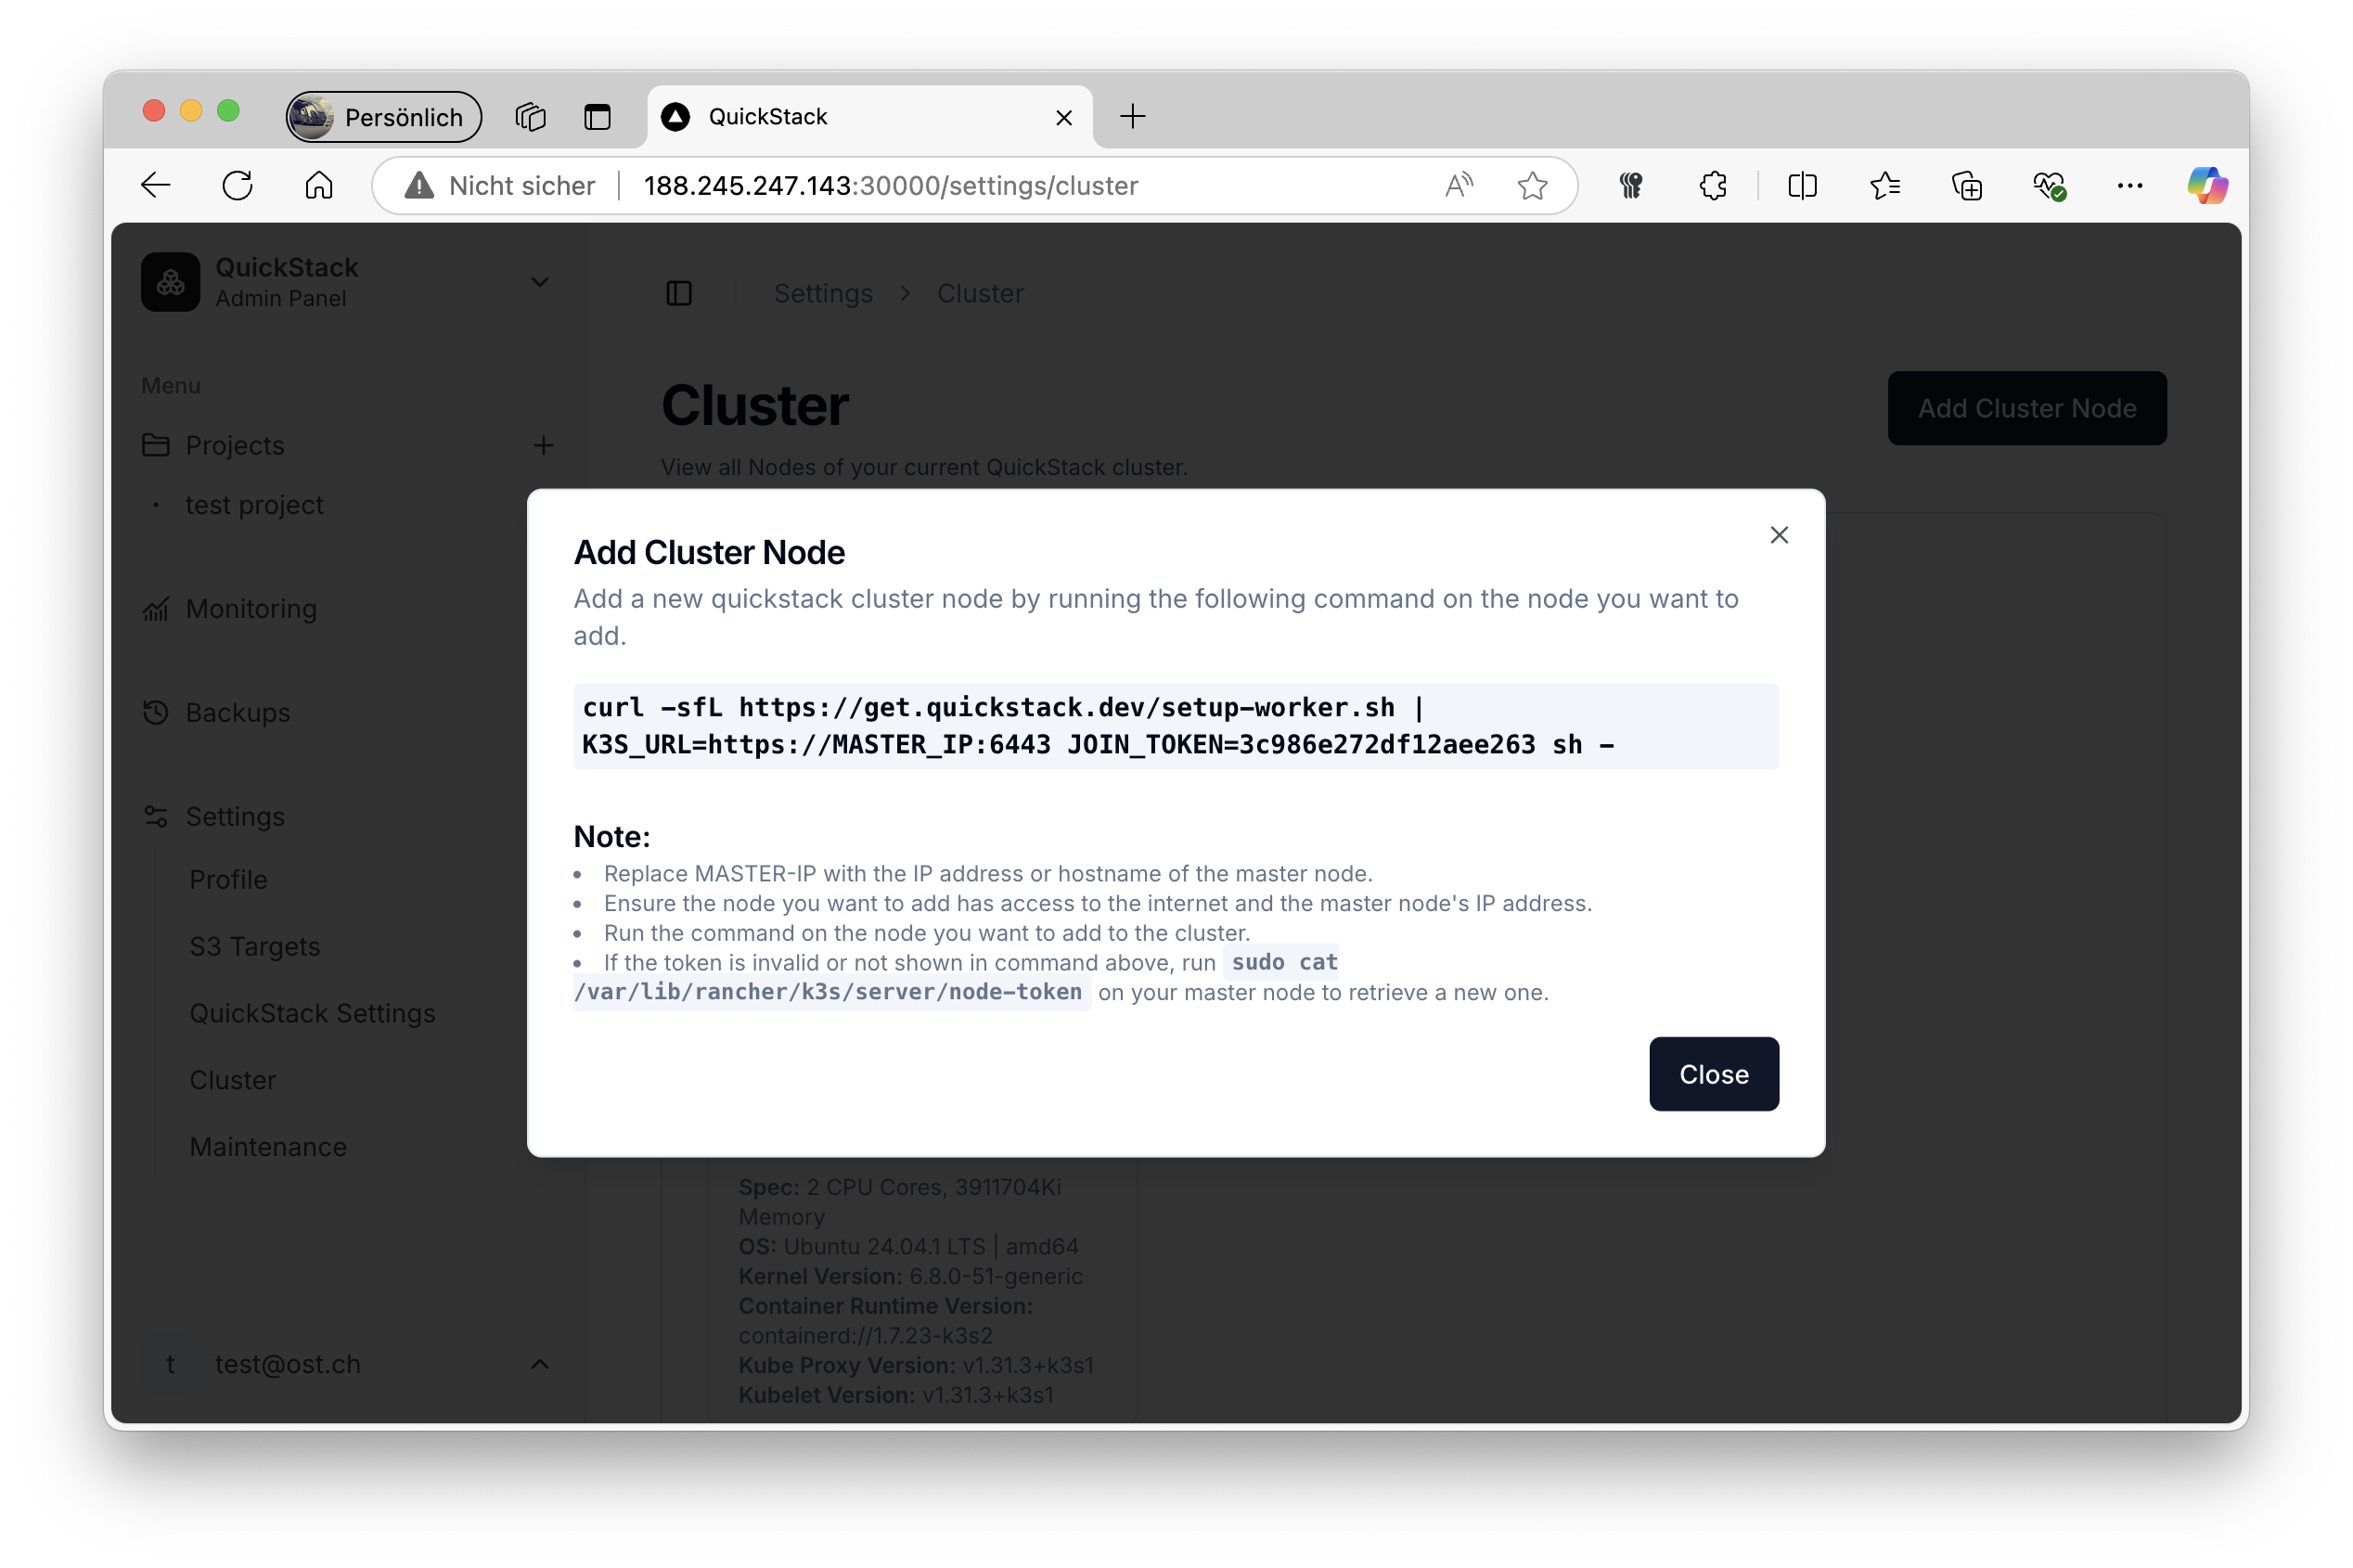
You will see a button with the headline "Add Cluster Node". Inside the card you'll find a command that looks something like this:
This command is generated for your specific QuickStack setup.
curl -sfL https://get.quickstack.dev/setup-worker.sh | K3S_URL=https://<MASTER-IP>:6443 JOIN_TOKEN=<YOUR_JOIN_TOKEN> sh- Important: Keep this command handy, you will need it in the next step. This command contains your server's IP address and a special "key" that allows additional servers to join your cluster.

2. Connect Additional Nodes to the Cluster
-
Connect to the additional VPS Connect to one of the VPS that you want to add to the cluster via
ssh: -
Execute the Join Command: Copy the command that you previously obtained from QuickStack and paste it into the terminal of the server you want to add and execute it.
-
Repeat for Each Additional Node: Repeat steps 1 and 2 for every additional server you want to join the cluster. Each server will be configured as a worker node, and the master node will orchestrate everything between them.
3. Verify Cluster Setup in QuickStack
-
Navigate to the Cluster Overview: Go back to the QuickStack web UI, navigate to "Settings" and then "Cluster".
-
Check Node List: You should see all servers you've added to the cluster (Maybe you need to refresh the page).
- Status: The "Status" column for each server should show that the server is "Online" and part of the cluster.
It may take a few minutes for the new servers to be ready for use, event if they are already listed in the cluster overview.
Troubleshooting
If you encounter any issues, here are some tips:
- Connection Problems:
- Ensure that all servers can connect to the primary/master server over the network. You might need to configure firewall settings.
- Verify that the join command is correct.
- Nodes Not Joining:
- Check that the
JOIN_TOKENhasn't changed on the Master Node. If the token has changed you need to run the commandsudo cat /var/lib/rancher/k3s/server/node-tokenon your master node to retrieve a new one. - Ensure that your additional server has access to the internet.
- Check that the
- No apps are scheduled on the new node:
- Ensure that the second node is connected to the same network as the master node.
- Check the firewall settings on the second node.
- Public Network problems
- Ensure that the server can connect to the internet.
- Ensure that the ports 443 and 80 are open.
- In QuickStack, the new Node is not showing up
- Ensure that you waited a few minutes after running the installation script.