Cluster Nodes
Add and remove worker nodes, manage scheduling, and monitor node health in your QuickStack cluster.
QuickStack allows you to scale your applications and improve availability by setting up a cluster across multiple Virtual Private Servers (VPS). This guide walks you through the process of connecting additional servers to your primary QuickStack installation. The initial server is the master node; additional servers you join are worker nodes.
Understanding the Concept of a Cluster
- What is a Cluster? A cluster is a group of computers (in this case, VPSs) that work together as a single system. By distributing your applications across multiple servers, you can handle more users, and you provide a more stable environment if one server has a problem.
- Single Node Cluster: A single node cluster is a QuickStack installation on a single server. This is the default setup when you install QuickStack for the first time.
- Multi Node Cluster: A multi-node cluster is a QuickStack installation that spans multiple servers. Each server in the cluster is responsible for running a part of the applications you deploy. It is recommended to use a private network for the communication between the servers.
Single Node Cluster | Multi Node Cluster |
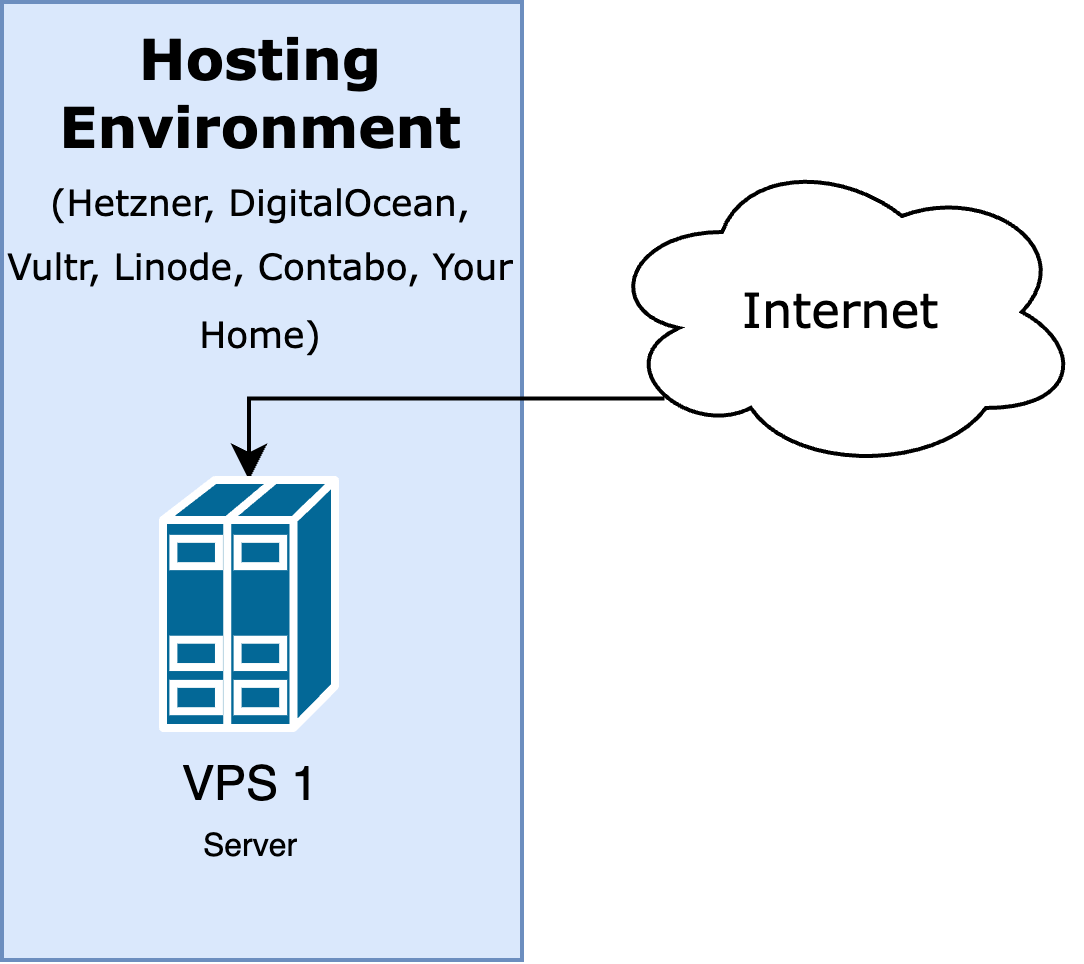 | 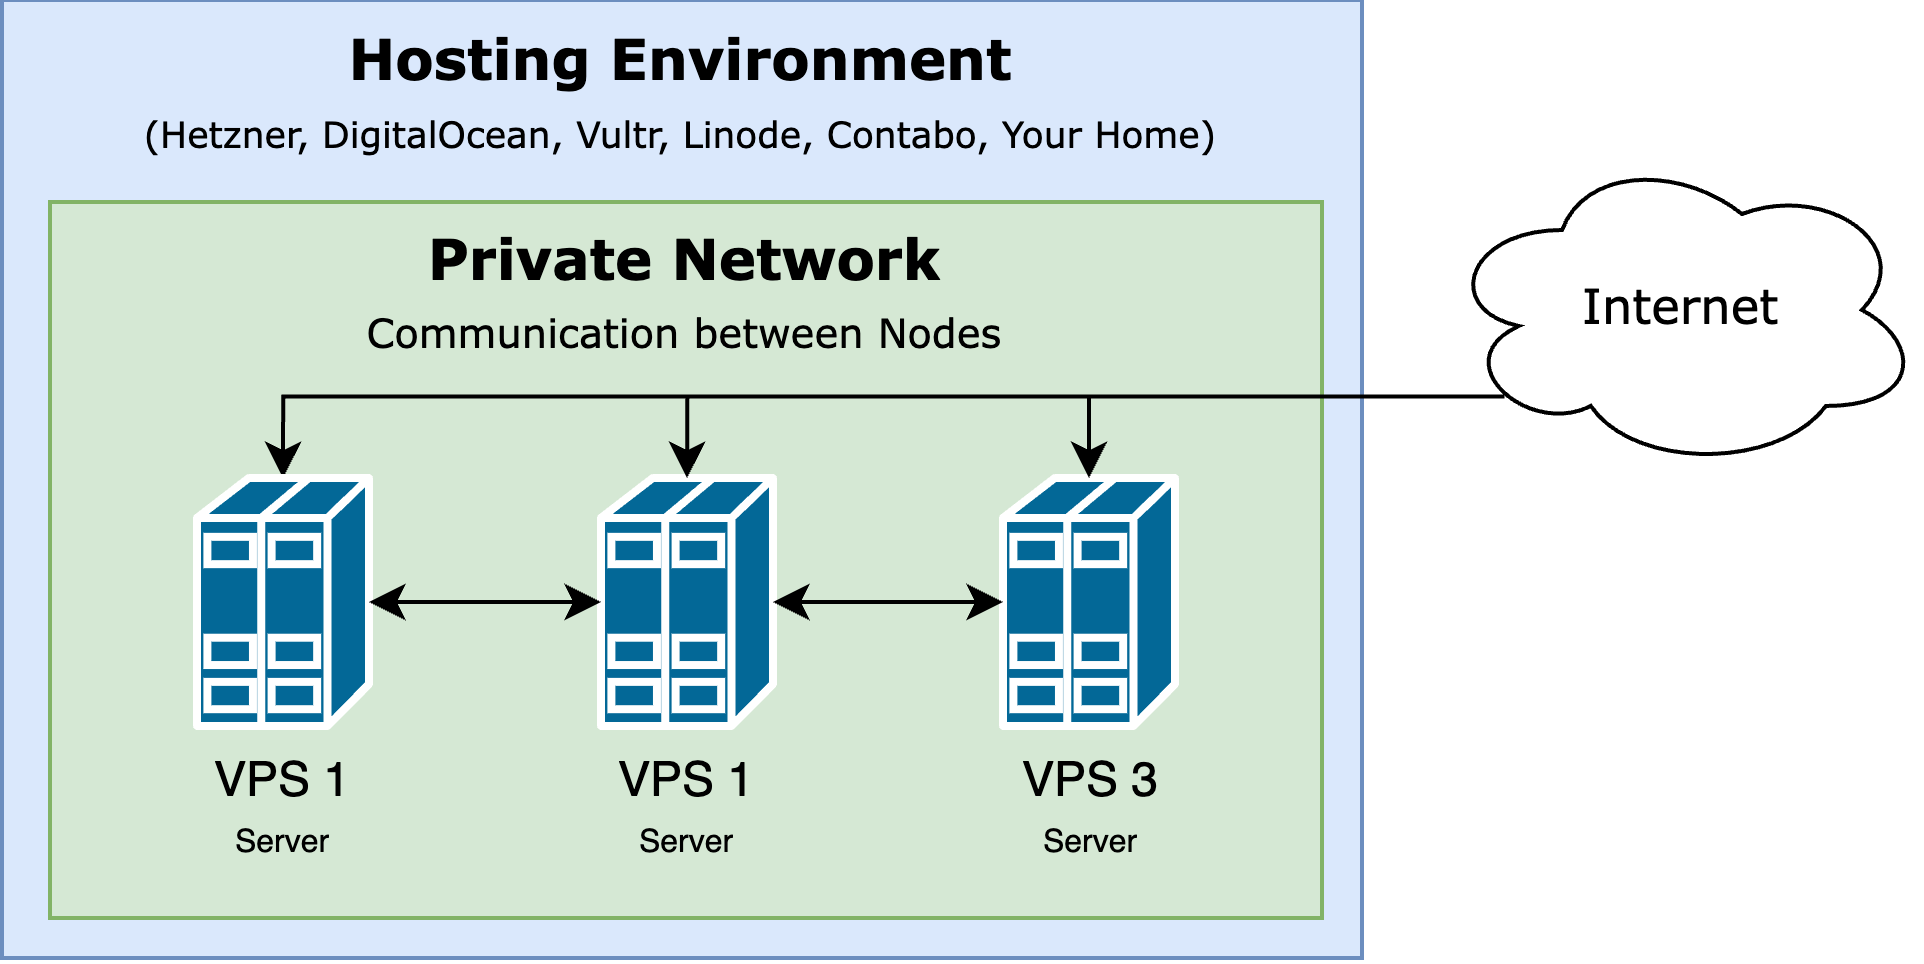 |
Viewing cluster nodes
- Go to QuickStack Settings → Cluster.
- All nodes and their status are listed.
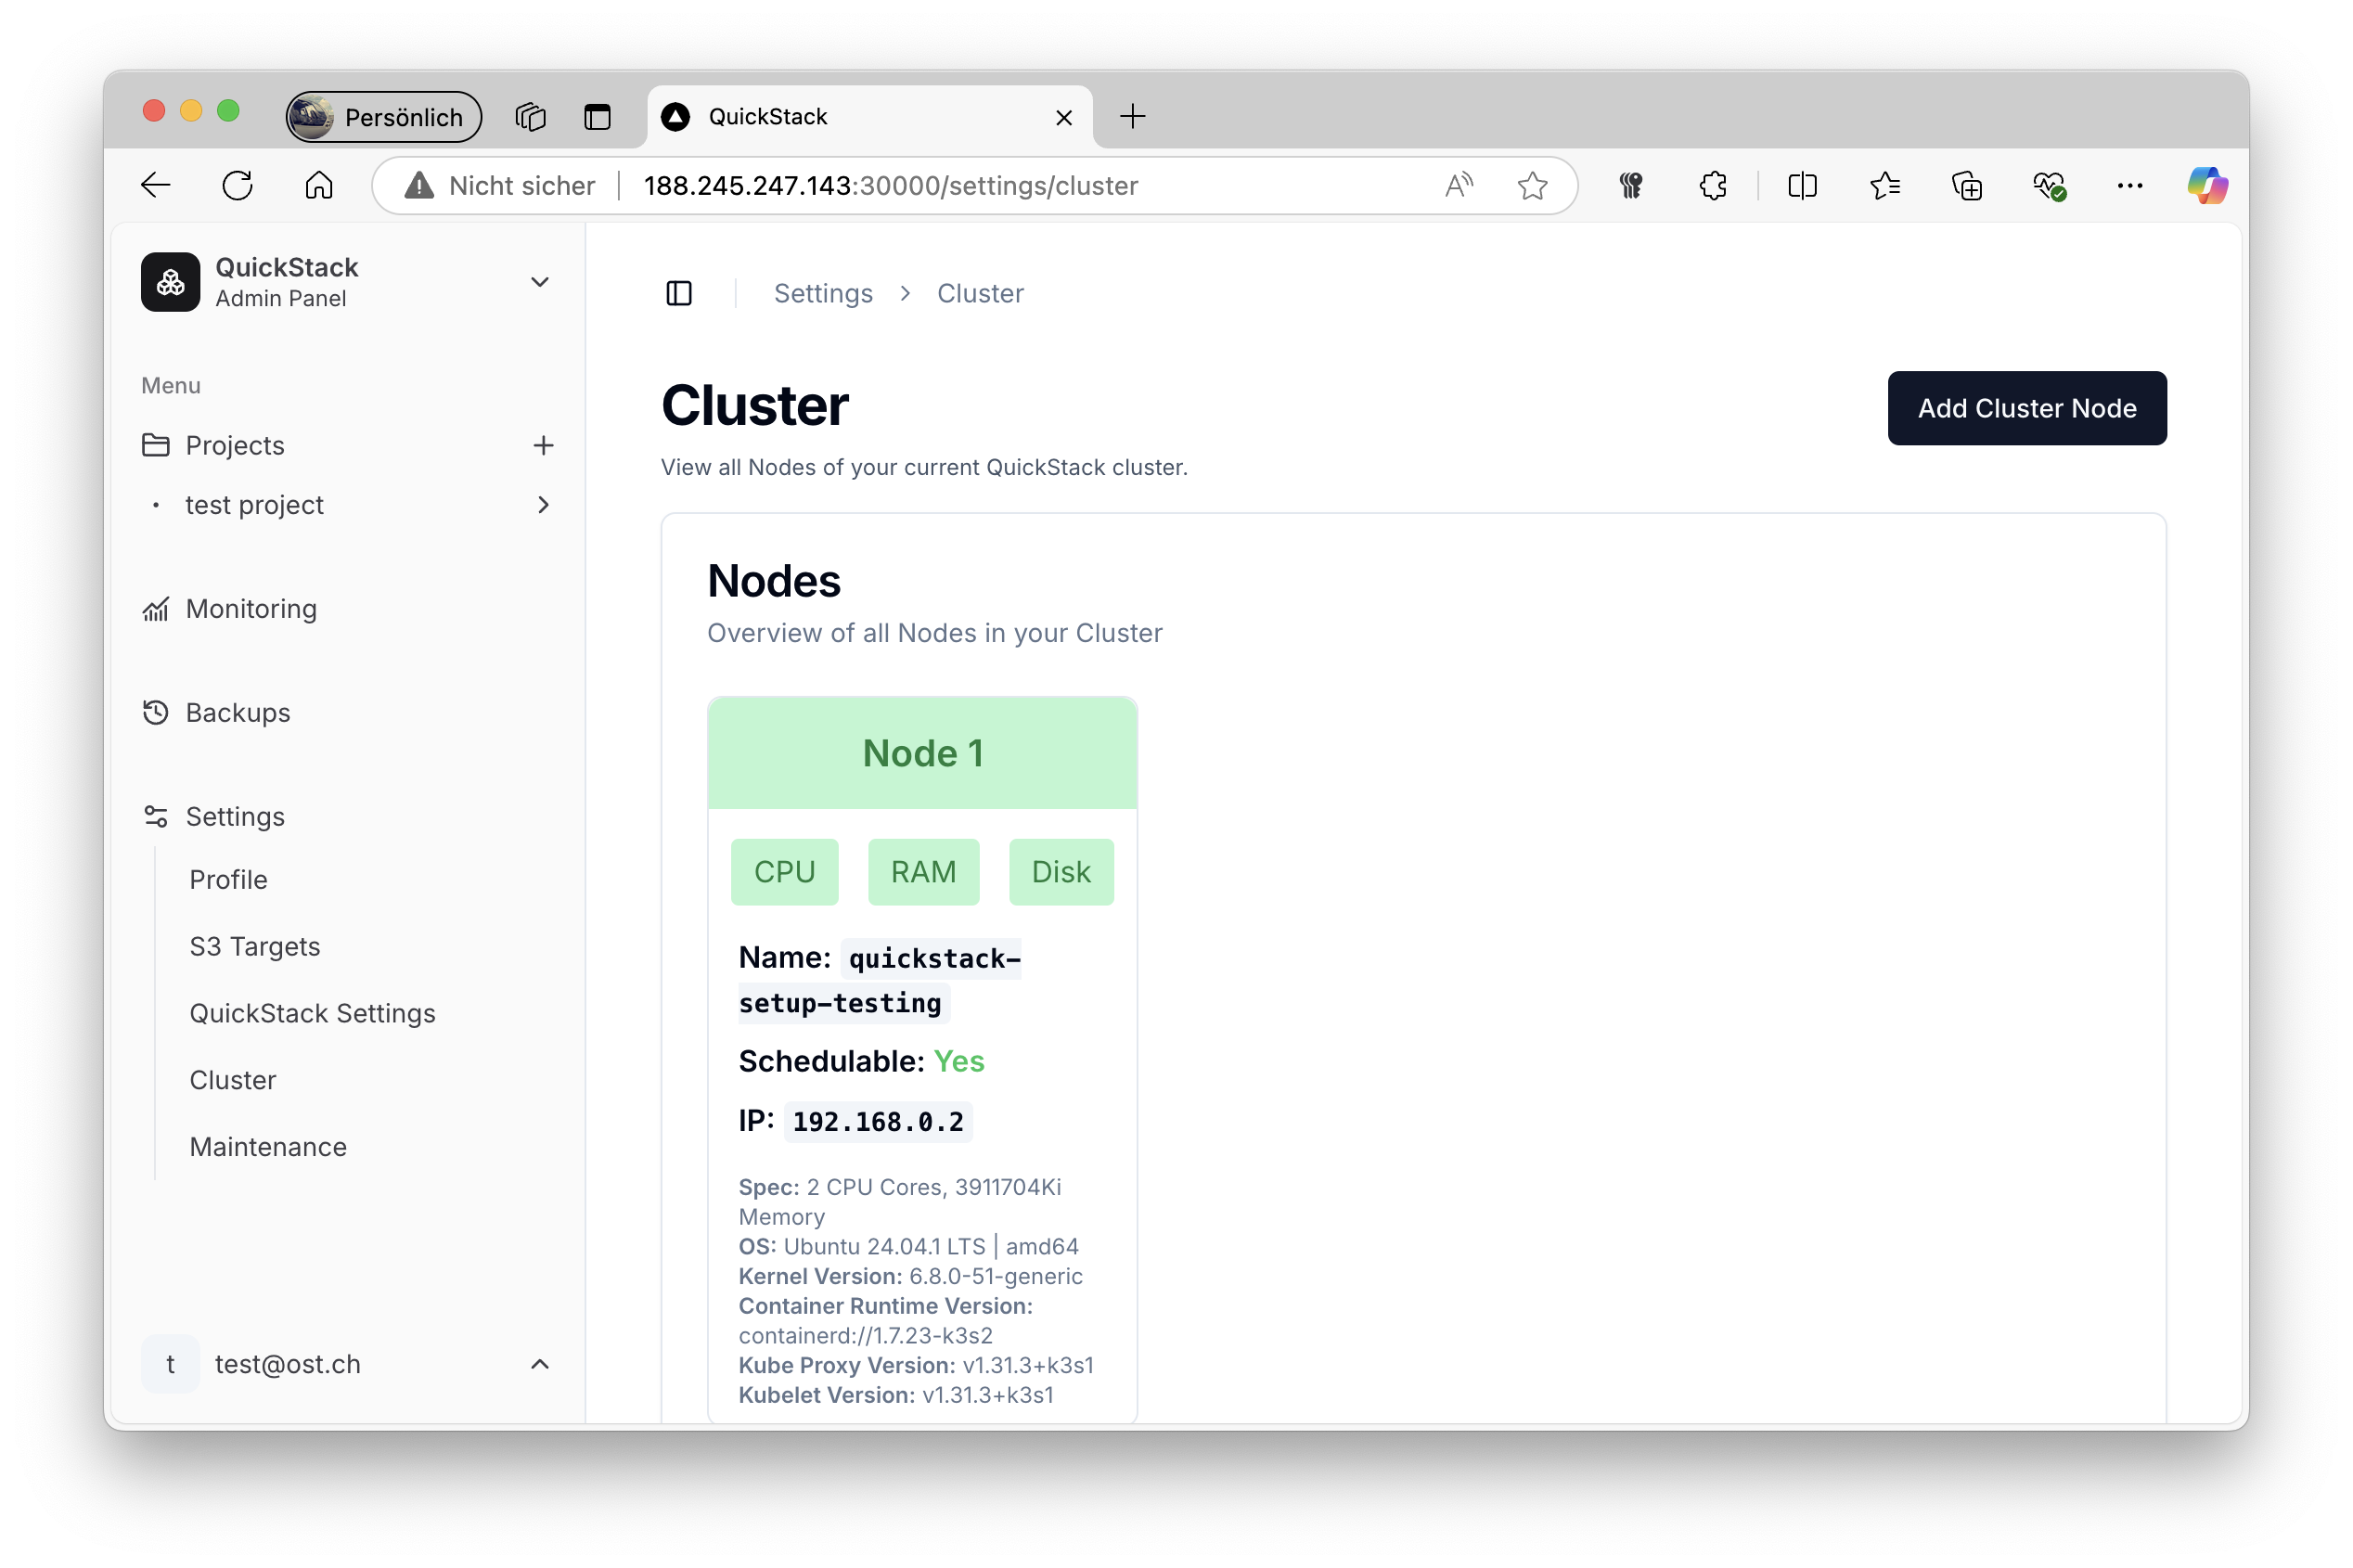
Each node shows:
- Name — hostname or identifier
- CPU / RAM / Disk status — 🟢 normal / 🔴 pressure
- Schedulable — whether new workloads can be placed here
Add a worker node
Prerequisites
- Supported Linux distribution (Ubuntu, Debian, etc.)
- Network connectivity to the master node
- Port 6443 (Kubernetes API) accessible from the new server
- SSH access to the new server
Step 1: Get the join command
- Go to QuickStack Settings → Cluster.
- Click Add Cluster Node.
- Copy the displayed command.
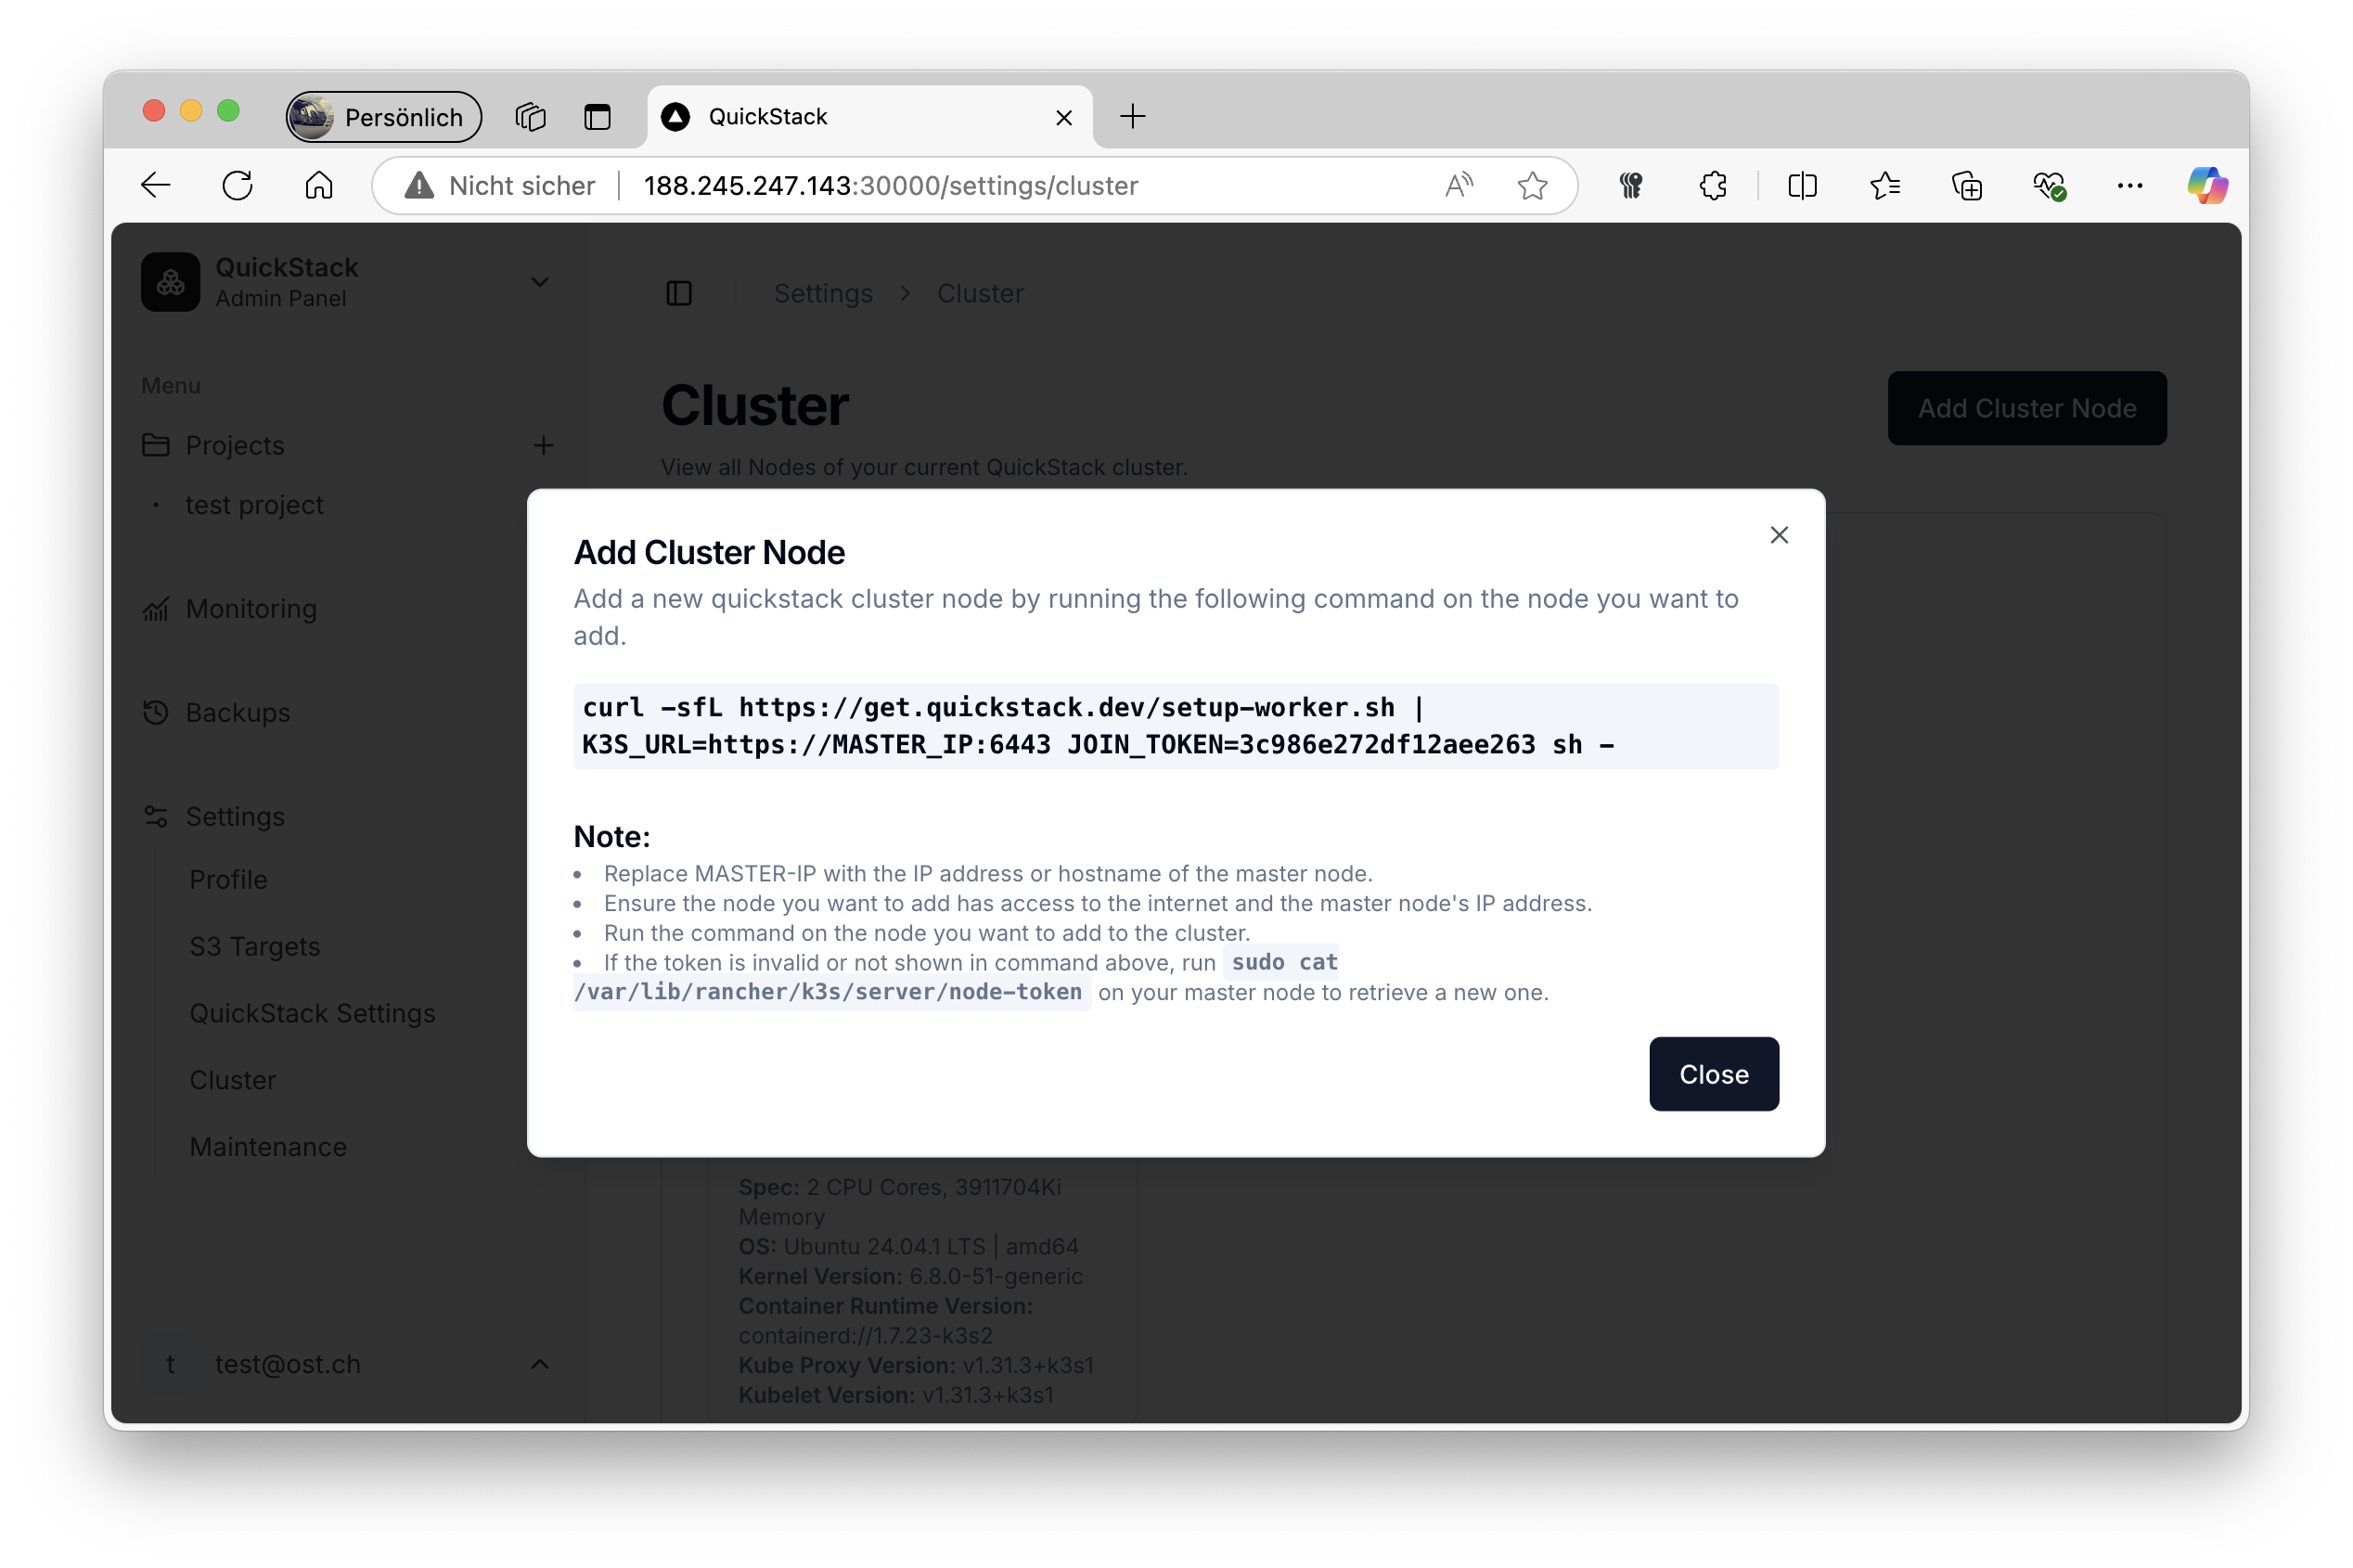
The command looks like:
curl -sfL https://get.quickstack.dev/setup-worker.sh | K3S_URL=https://MASTER_IP:6443 JOIN_TOKEN=K10... sh -Node token not showing? Retrieve it manually from the master node:
sudo cat /var/lib/rancher/k3s/server/node-tokenStep 2: Configure the command
Replace MASTER_IP with:
- The internal/private IP for nodes in the same network (recommended)
- The public IP for nodes across the internet
Step 3: Run on the new server
ssh root@new-worker-server
curl -sfL https://get.quickstack.dev/setup-worker.sh | K3S_URL=https://192.168.1.100:6443 JOIN_TOKEN=K10... sh -
Step 4: Verify
Return to QuickStack Settings → Cluster. The new node appears within a few minutes. Verify all status indicators are green.
Manage node scheduling
Deactivate a node (drain)
Prevents new pods from being scheduled on this node. Existing workloads continue running.
- Find the node in the cluster overview.
- Click the node and select Deactivate Node.
Deactivating moves existing workloads (drain).
Reactivate a node (uncordon)
- Find the deactivated node.
- Click Activate Node.
Remove a worker node
-
- Deactivate a node (drain)
-
- Delete the node (on master)
kubectl delete node <node-name>Troubleshooting
| Symptom | Fix |
|---|---|
| Node not joining | Verify port 6443 is open; check that JOIN_TOKEN is current |
| Node appears but apps not scheduled there | Check node is marked Schedulable; verify it's on the same private network |
| Red CPU indicator | Too many processes running; optimize workloads or add nodes |
| Red RAM indicator | Memory pressure; review memory limits or add RAM |
| Red Disk indicator | Disk space low; run cleanup or expand disk |
Planning considerations
- Use an odd number of master nodes (1, 3, 5) for HA quorum
- Use Longhorn storage class for volumes that must survive node failure
- Keep 20–30% capacity free for failover scenarios
- Ensure all nodes can communicate on required k3s ports