Domains
A domain is the unique name (e.g., example.com) used to identify a website on the internet. In QuickStack, domains are essential for making your applications accessible to the public. This guide will walk you through adding, configuring, and managing domains for your QuickStack applications.
Understanding Domain Concepts
- Root Domain: The main domain (e.g.,
example.com). You need to own this domain to use it in QuickStack. - Subdomain: A domain that is part of a larger domain (e.g.,
app.example.com). You can create subdomains for different applications. - SSL/TLS: Security protocol that encrypts communication between your server and users' browsers, ensuring privacy and data integrity.
- Reverse Proxy: A server that sits in front of your applications, handling incoming requests and routing them to the appropriate application. QuickStack uses Traefik as the reverse proxy, handling SSL termination and load balancing.
Adding a Domain to Your Application
Make sure to configure your DNS settings correctly before adding a domain to your application.
Point your domain or subdomain to the IP address of your QuickStack server by creating an A record in your DNS settings. You need to perform these changes at the DNS provider of your domain. Common DNS providers are Cloudflare, GoDaddy, and Namecheap.
Don't have a custom domain yet? You can use the built-in QuickStack.me Domain feature to instantly get a working HTTPS domain for your application without any DNS configuration.
- Navigate to Application Settings:
- Select the App you want to configure by clicking the application name.
- Select the "Domains" tab.
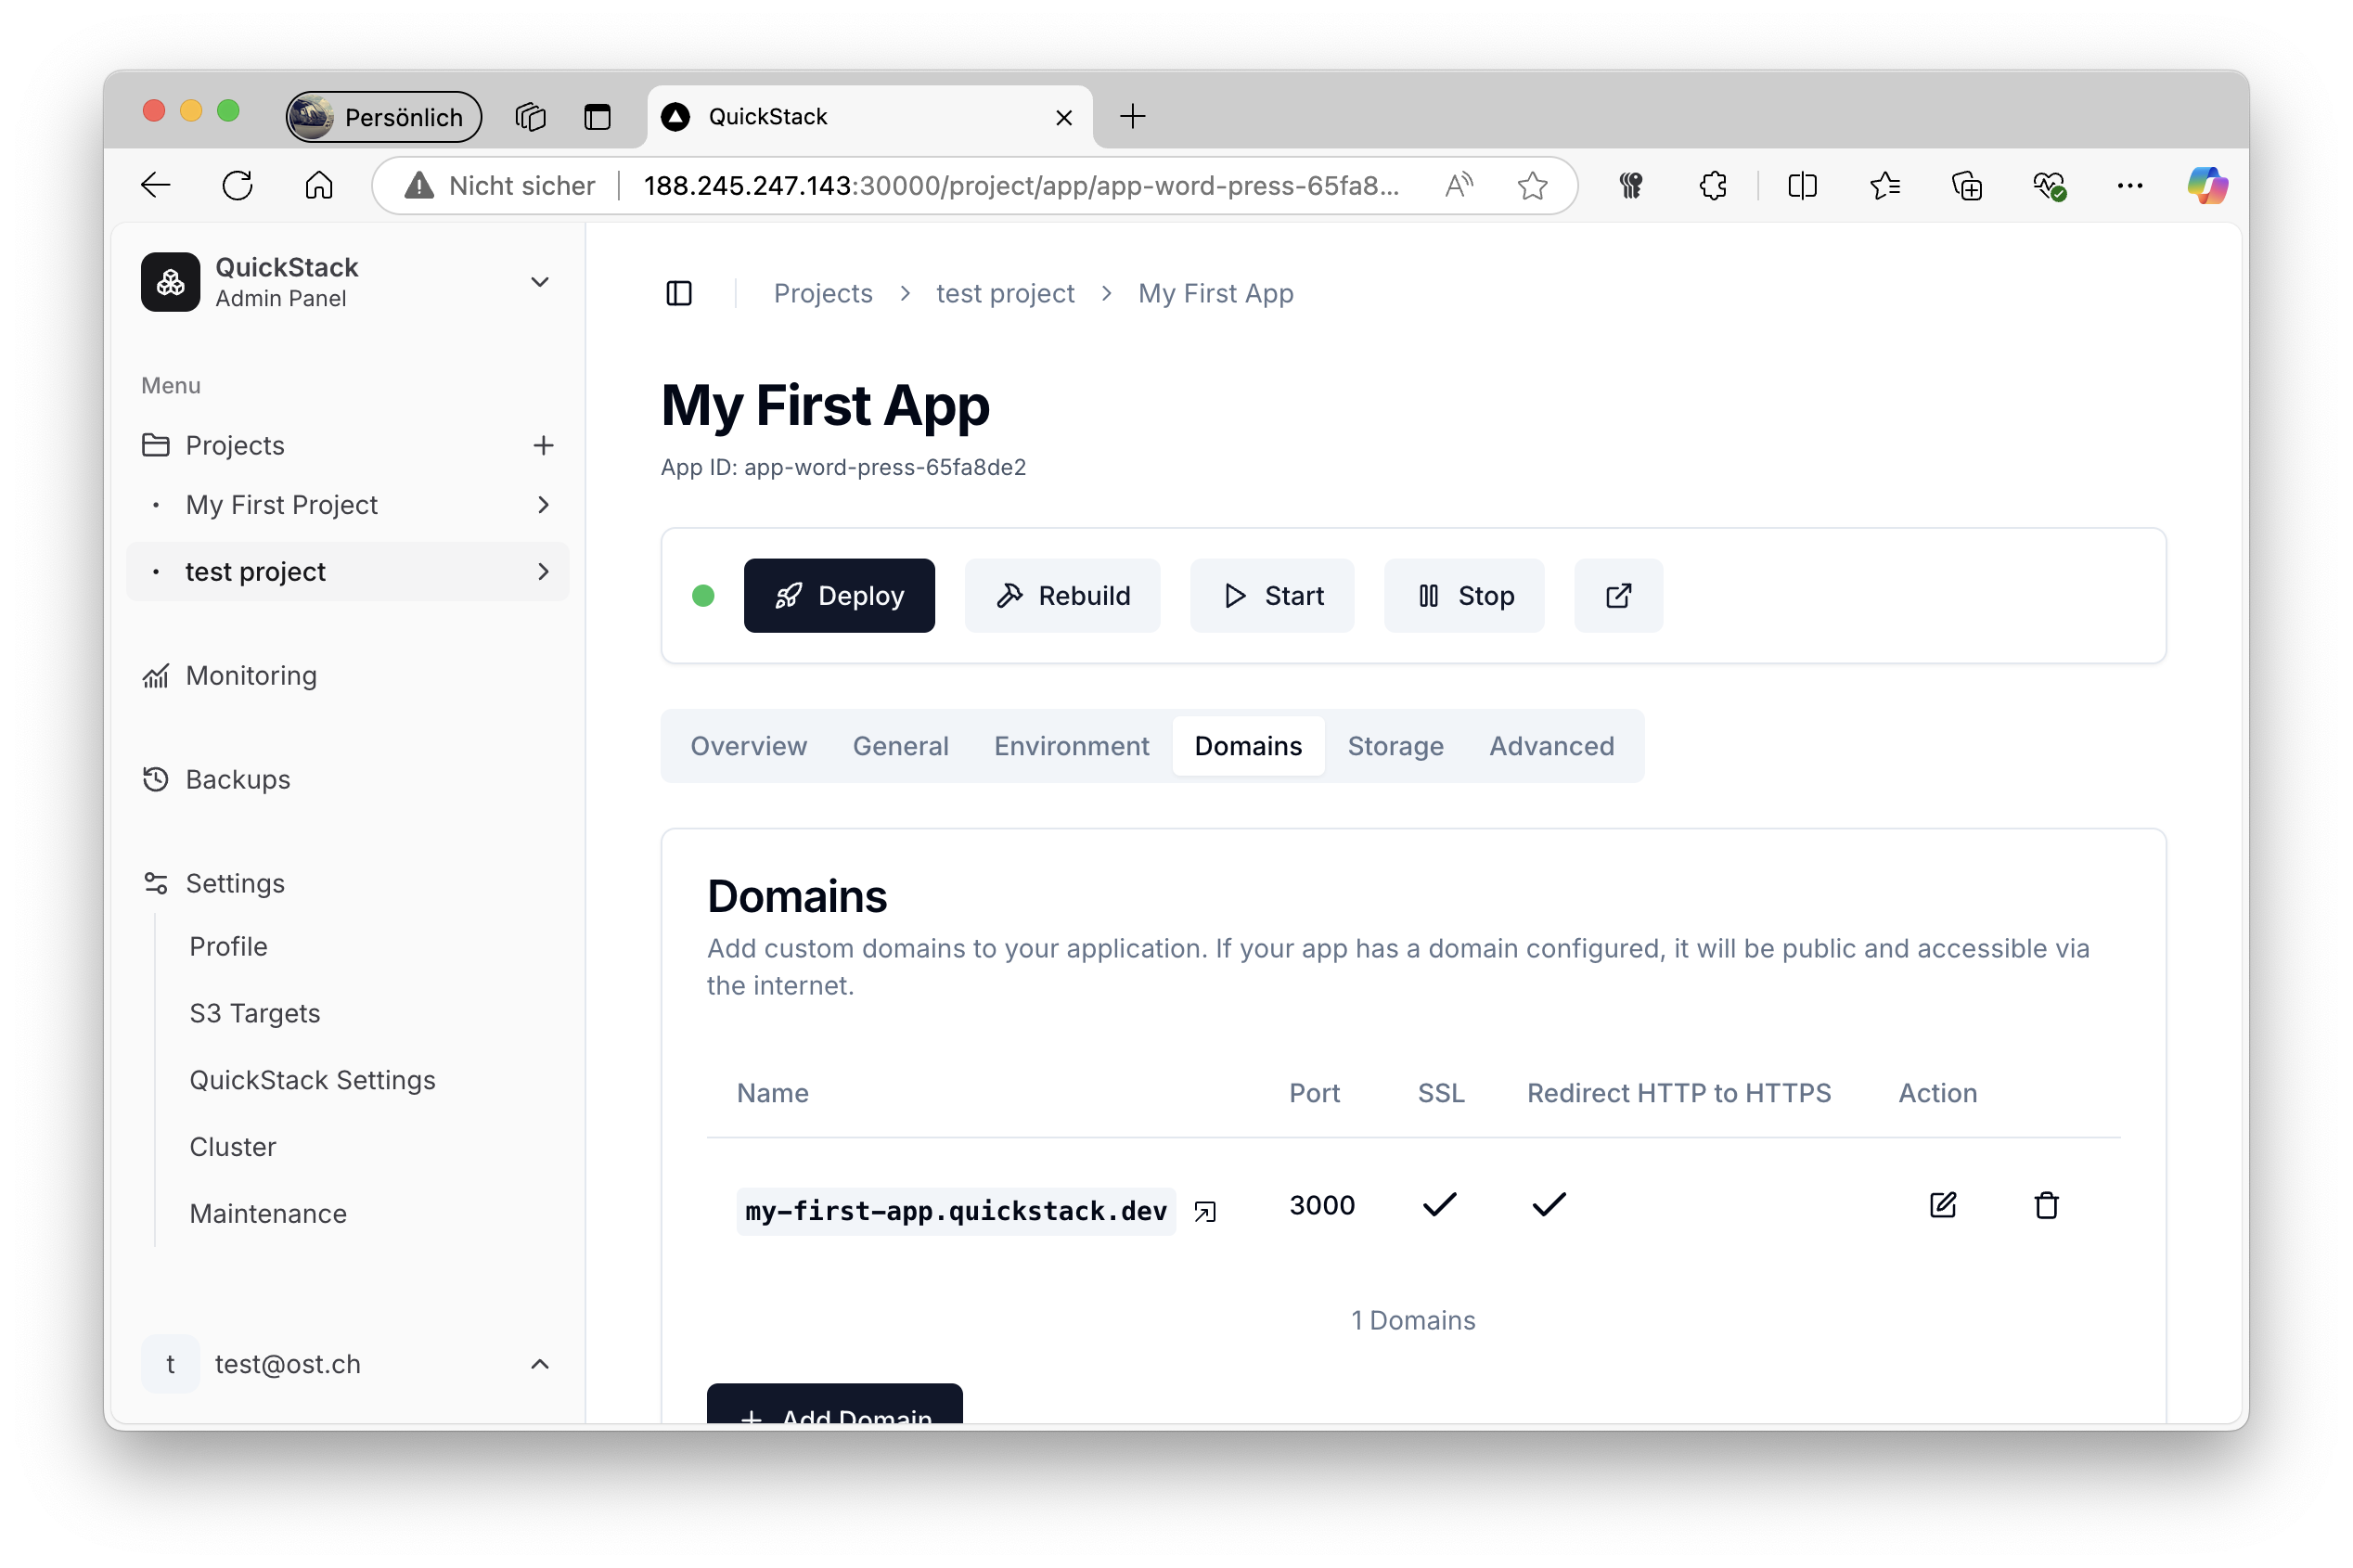
-
Add a New Domain:
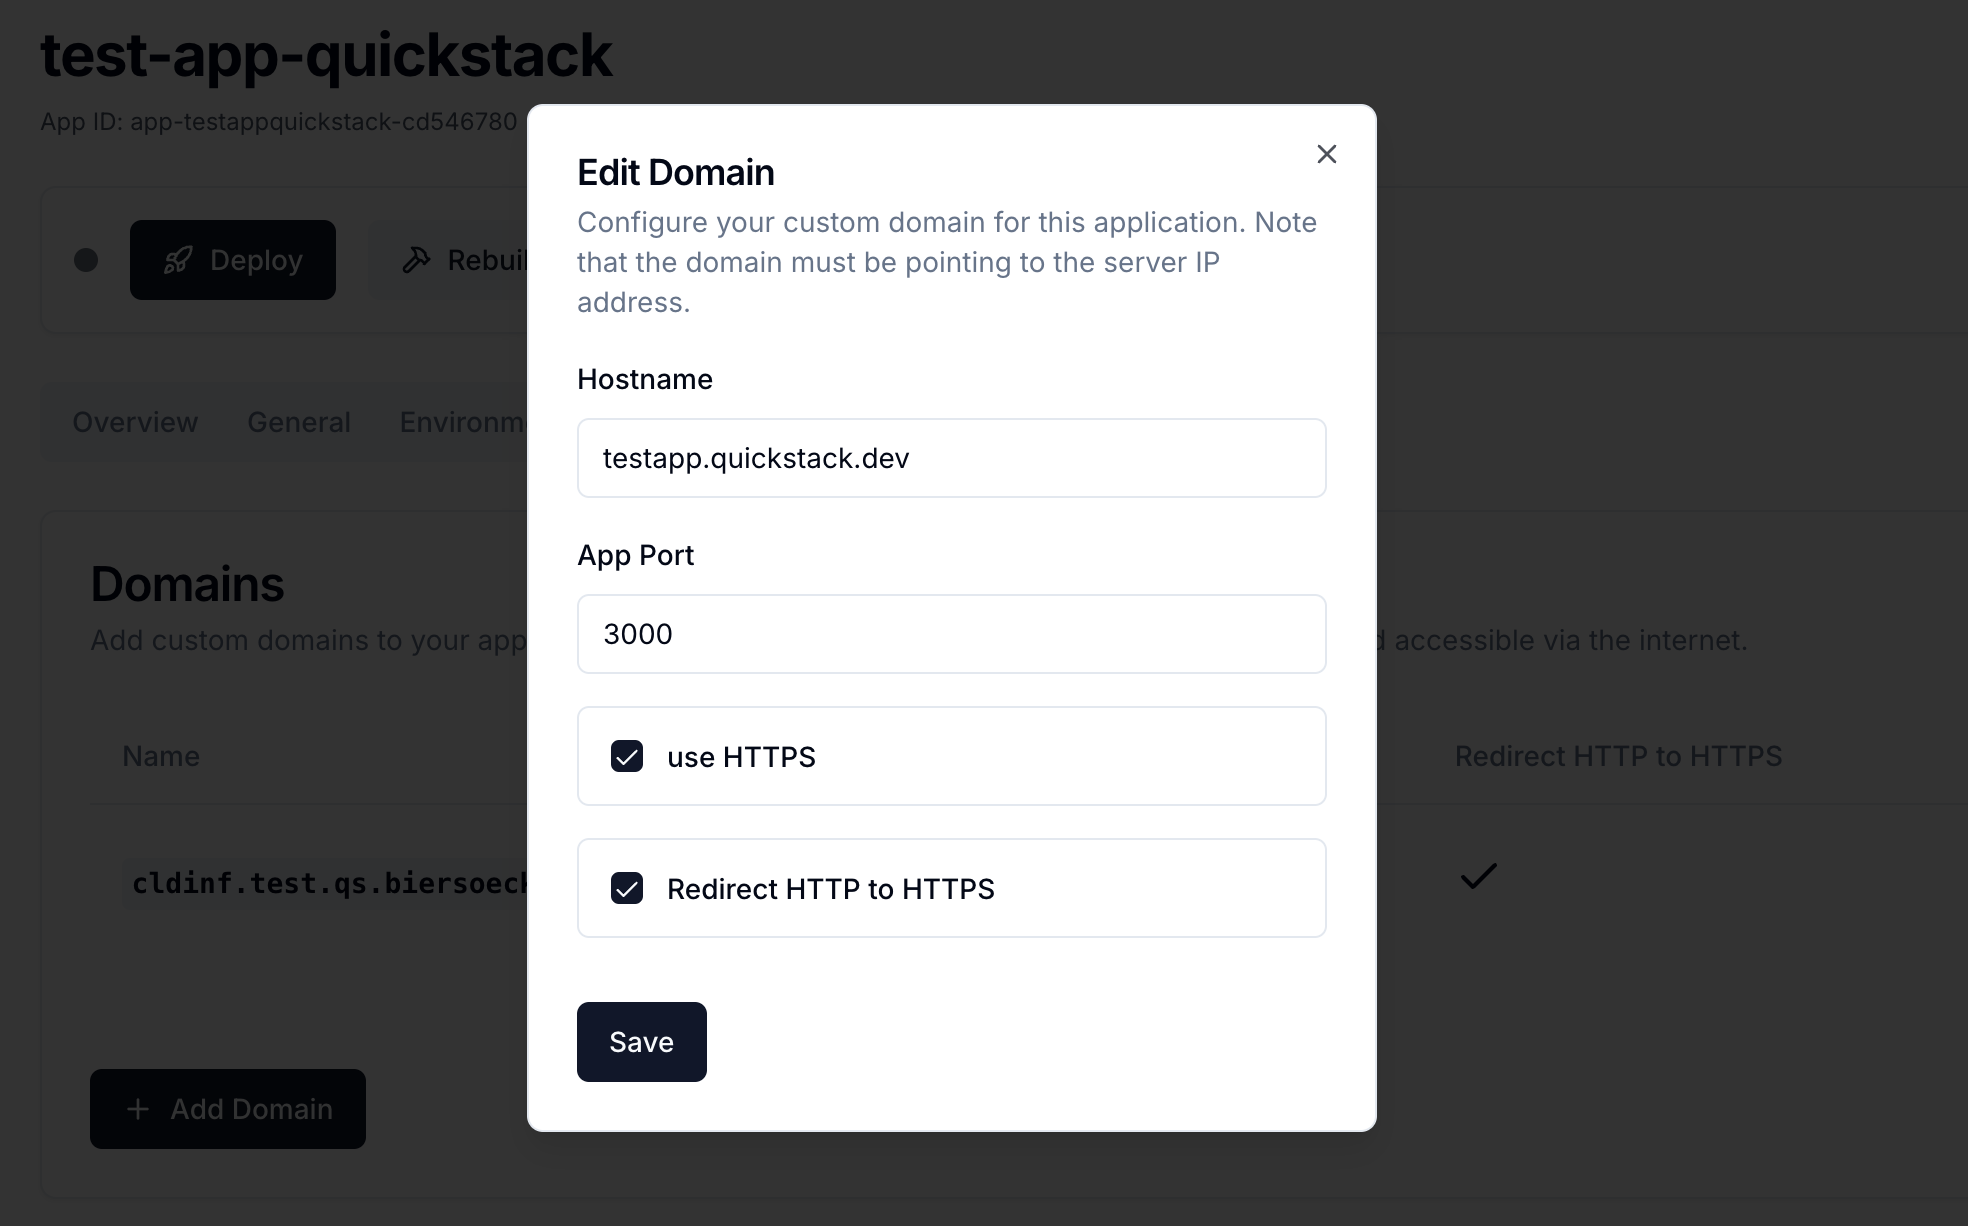
- Click on "Add Domain". This action opens a Dialog named “Edit Domain”.
- Hostname: Type in the Hostname you want to assign.
- App Port: Select the app/container port this domain will listen to.
- Use HTTPS: If you want to assign an SSL certificate to the domain, enable this option. The certificate will be automatically provisioned by QuickStack.
- Redirect HTTP to HTTPS: If
Use HTTPSis enabled, you can also enable this option to automatically redirect all http traffic to https. - Confirm your settings by clicking the "Save" button.
Make sure to hit the "Deploy" button after adding a new domain to apply the changes.
Accessing Your Application
Once the deployment process is finished, access your application by entering your configured domain into your browsers address bar.
Troubleshooting
- Domain does not work:
- Make sure your DNS settings are configured correctly, and that your Domain is pointing to the correct IP address of your server.
- Domain is pointing to the server, but app still doesn't show:
- Try using a different port for the App.
- Ensure that the DNS settings of the domain are correctly configured to point to the server IP address.
- Clear your browser cache.
- SSL certificate validation fails
- It may take a few minutes for the DNS settings to propagate.
- Node Port Configuration
- Currently QuickStack doesn't support forwarding traffic from an other node port than 80 or 443 to your application.
- Still having problems?
- Create an issue on our GitHub repository