Automated App Deployments using Webhooks
Webhooks provide a way to automate deployments of your applications in QuickStack. This is especially useful for CI/CD (Continuous Integration/Continuous Deployment) pipelines, allowing you to trigger a new deployment whenever changes are pushed to your Git repository. This guide covers how to configure and use webhooks in QuickStack.
Understanding Webhooks
- What is a Webhook? A webhook is an automated HTTP callback made when something happens; it's a way for applications to communicate in near real-time. In the context of QuickStack, a webhook can trigger a deployment whenever changes are made to your Git repository.
- Use Cases:
- Automatic deployments on code commit.
- Integration with CI/CD pipelines for testing and deployment.
- Triggering deployments from other automated systems.
Configuring Webhooks
-
Navigate to Application Settings: Select the application for which you want to configure a webhook.
-
Go to the "Overview" Tab
-
Find the webhook setting and click on "Enable Webhook deployments"

A webhook URL will be generated.
-
Copy the Webhook URL: Copy the generated webhook URL. It will look something like:
https://your_quickstack_domain_or_ip/api/v1/webhook/deploy?id=YOUR_WEBHOOK_ID. -
Configure the Webhook in your Git Repository: Add the webhook URL as a webhook in your Git repository settings (e.g., GitHub, GitLab). This process varies depending on your Git provider.
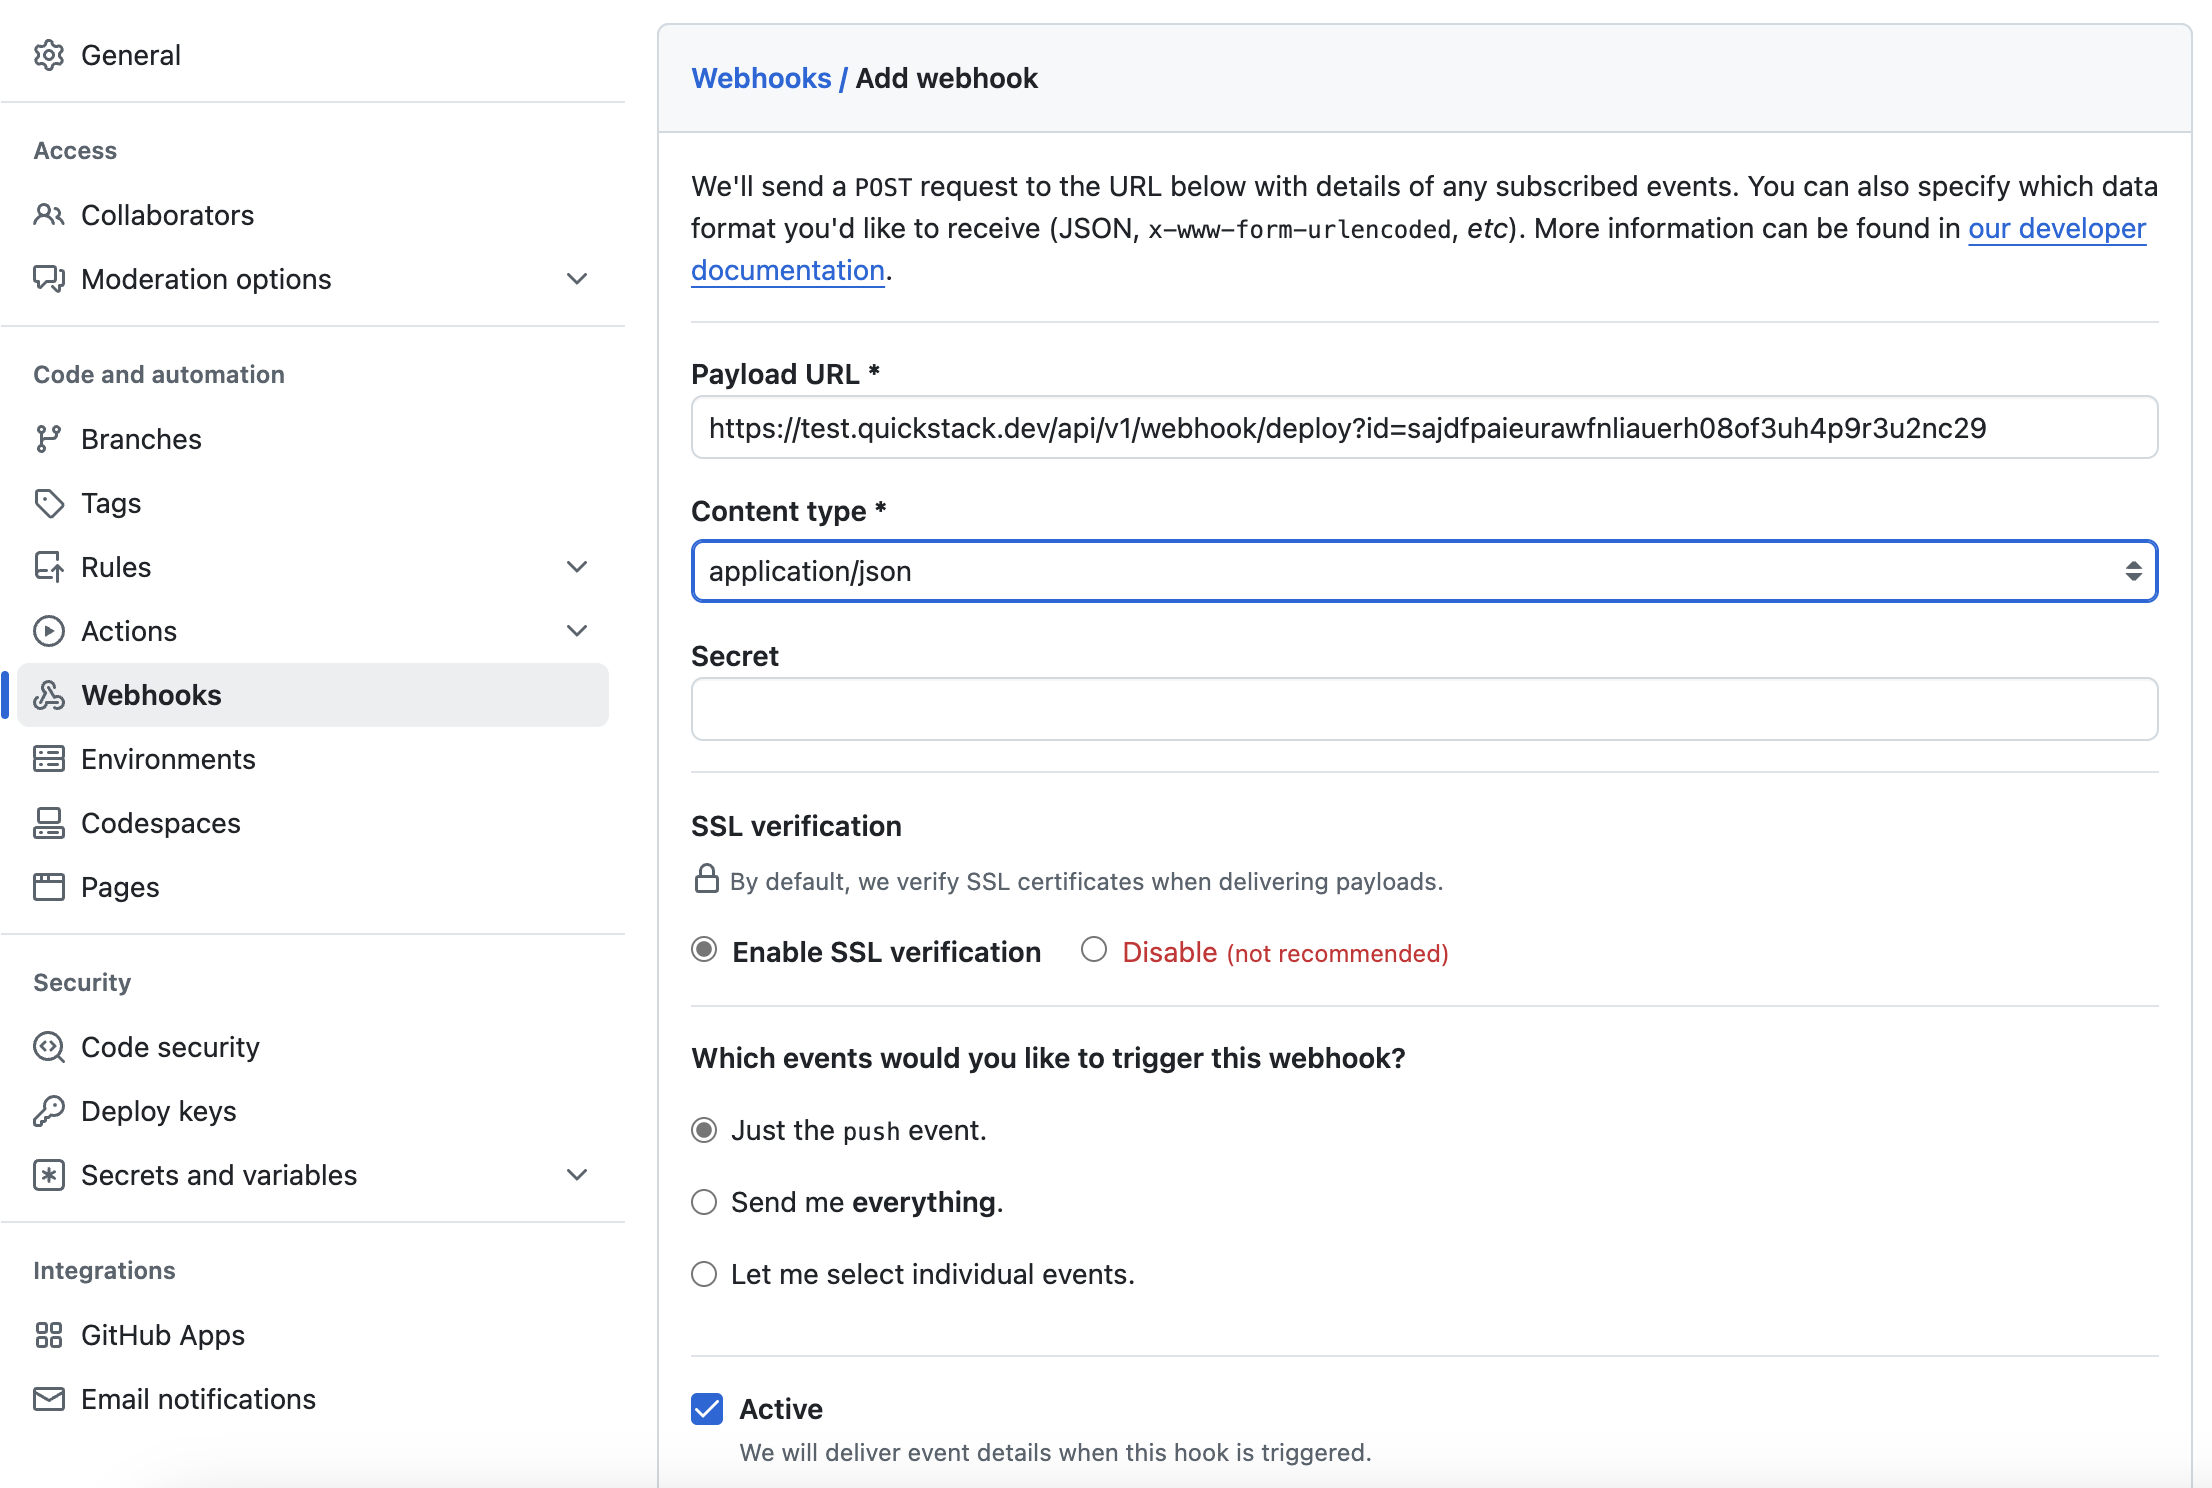
GitHub Example
- In your GitHub repository, navigate to "Settings" > "Webhooks".
- Click "Add webhook".
- Payload URL: Paste the QuickStack-generated webhook URL here.
- Content type: Select
application/json. - Which events would you like to trigger this webhook?: Choose
Just the push event. - Click "Add webhook".
GitLab Example
- In your GitLab repository, navigate to "Settings" > "Webhooks".
- URL: Paste the QuickStack-generated webhook URL here.
- Trigger: Select
Push events. - Click "Add webhook".


Testing Your Webhook
- Make a Git Commit: Push a change to your configured branch in your Git repository.
- Check QuickStack: Verify that a new deployment is automatically triggered in QuickStack. You can verify it in the overview of your app.
Troubleshooting
- Webhook Not Triggering:
- Check the webhook configuration in your Git repository settings and ensure the URL is correct.
- Verify that the selected events (e.g., push events) are correctly configured to trigger the webhook.
- Examine your Git provider's webhook logs (if available) for any error messages.
- Deployment Fails: Review the deployment logs for error messages, as with any deployment process.